Create a Vision Board for Success in 5 Simple Steps
If you’ve heard of the term vision board but are not sure how to make one or how to use it, this article is for you. We will discuss how to create a vision board for success, but the basic concept applies to any topic or goal you want to achieve. Vision boards are beautiful representations of your dreams and serve as powerful manifestation tools. Creating one is highly therapeutic, and if you use it regularly, it will help you achieve your goals. Let’s get started.
What is a Vision Board?
A vision board is essentially a collage of images and words that represent your dreams and goals. You can create a vision board for any dream or aspiration you like. You can make your board specific, relating to one aspect of your life, for example, health, family, or career. Alternatively, you can design your board to be more general, representing different things you would like to manifest. A vision board serves as a way to regularly focus your attention on a desired outcome.
We are going to create a vision board for success, which is an excellent option because it is easily adaptable to whatever you want to be successful at right now, whether that be creating abundance, artistic or writing projects, manifesting a new relationship, or even deepening your spiritual journey. Whatever you want to succeed at, you can create a visual representation of what that looks like for you with your own vision board.
How to Create a Vision Board for Success in Five Simple Steps
Now you know what a vision board is and what it is used for, let’s go through how to create a vision board for success in five simple steps. This tutorial gives you options for creating your vision board digitally and as a physical item.
Step 1: What Does Success Mean to You?
Before you go about creating your board, there are a couple of things you need to decide. Firstly, you need to choose a topic. Journal the answers to these three questions to come up with your perfect theme.
- What do you want to be successful at right now?
- What things or results do you want to manifest in your life?
- What is your most important project or goal?
Secondly, you need to have an idea of what success in that area means to you. Again, write the answers to these questions in your journal.
- How will you know when you have achieved your goal?
- Will you have something physical like more money, a new home, or the first draft of a book? Or something less tangible like a new routine, a relationship, or a dream job?
- How will you feel when you have achieved it?
Step 2: Digital or Physical?
The next thing you need to need to decide to create a vision board for success is if you want it to be digital or physical. What are the differences between the two?
Digital Vision Board
Digital vision boards are made on your computer, tablet, or phone. You can create them in any app or software that allows you to make photo collages. There are plenty of free options for this, such as Fotor, Canva, and BeFunky.
My favorite is Canva because the free version has so many fantastic options for adding elements, stickers, borders, photos, backgrounds, frames, and fonts to your designs, and you can choose from hundreds of templates, or create your own from scratch. You don’t need to buy the pro version, but if you do, you also get access to features such as instant resize to print your vision board in different sizes, and the ability to remove a background from a photo, which can come in useful when creating vision boards.
Physical Vision Board
A physical vision board is more like scrapbooking. You need a piece of sturdy cardboard in your desired size. You can choose A4 or US Letter, but I think that’s a little small and will limit the amount of content you can add. I prefer A3 or even A2 size so that you have lots of space. You also need the following items:
- Scissors
- Glue
- Photos or images to represent your desired outcome
- Inspirations quotes or affirmations
- Embellishments (glitter, stickers, washi tape, leaves, pressed flowers, etc.)
Once you have gathered all your elements together, you arrange them on your cardboard in a beautiful and inspiring design. That is basically how you create a vision board for any topic you desire. Simply collaging a selection of content related to your goal, either digitally, or as a physical item.
Which option you select to create a vision board for manifestation is totally up to you. I have done both methods, and I personally prefer the physical technique because I feel that I can be more creative, and I love to add extra items as embellishments. But a digital version is great if you want to use it as your desktop or phone wallpaper. You can also print it and frame it.
Step 3: Find Your Content
Now you have decided on what topic you want to create a vision board for, what success in that topic looks like for you, and whether you wish to make a digital or physical vision board. The next thing you need to do is find some content to add to your board.
You can find content for your vision board online, offline, and generate your own content. Try these options:
- Do an online image search on the search engine of your choice
- Check out royalty-free image websites like Pixabay or Dreamstime
- Cut out pictures and sections of text from newspapers or magazines
- Take photos, sketch, or paint images yourself
- Search for inspirational quotes and write them by hand or print in a Word document
- Write positive affirmations and handwrite or print them in fancy fonts
If you are making a digital vision board, collect your images and words together in a file on your computer. If you choose to create a vision board for success as a physical item, print your pictures and text and then cut them out. Cut out any images and text you find in magazines and newspapers. Gather everything together in a box or large envelope, including any embellishments you want to use, such as feathers, leaves, stickers, washi tape, glitter, etc.
Step 4; Make Your Board Beautiful
Once you have gathered all of your content together, it’s time to get creative! I will outline the process for both digital and physical vision boards.
Make a Digital Vision Board
If you have decided to create a vision board for success digitally, you need to import all of your images into your chosen collage maker software, i.e., Canva. You can then select a collage template or use a blank board in the size of your choice.
Add your images to your board, using frames, borders, and filters, if you like. Also add some text displaying your chosen quotes or affirmations, if you want to use them. You can use single words, such as ‘Love,’ ‘Joy,’ ‘Abundance,’ ‘Success,’ etc.
Arrange your images and text in a beautiful and eye-catching way and fill in any spaces with stickers and other desired elements. Then, you’re done. Simply download your vision board and either use it as wallpaper, print, or both.
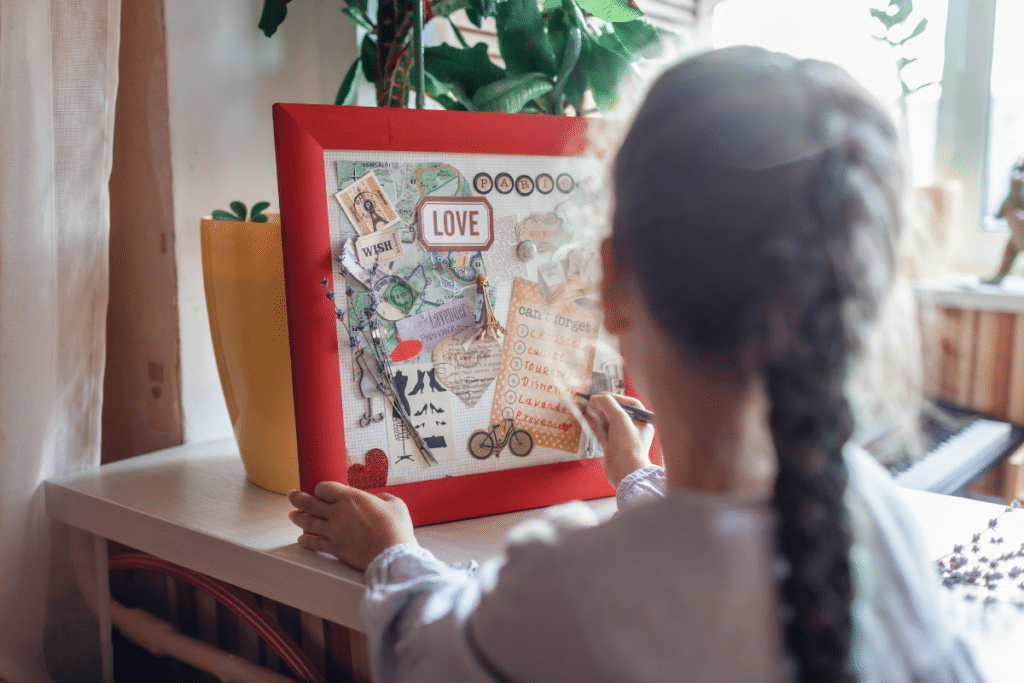
Make a Physical Vision Board
Start by laying out everything you have gathered together on a large flat surface. If you have a dining table, use that. Otherwise, feel free to use the floor. Take your board (covered with white paper if necessary/desired), and start placing your images, text, and other elements. Don’t begin gluing anything yet – you will most probably want to shift things around and play with the layout for a while until you are happy. Then, once you like the design, you can glue everything down.
Here are three things I like to do when I create a vision board for any goal or topic:
1: I like to use pretty washi tape to make a border for my vision board. Washi tape is a product used in crafting, journaling, greeting card making, and scrapbooking. It is a roll of tape that is colored, glittered, or has icons printed on it. You can buy washi tape in an abundance of different designs. Some options I have used before include glitter in varying colors, watercolor feathers, cats, unicorns, and hearts. Search Amazon for washi tape, and you’re bound to find one to fit your theme.
2: I add glitter by painting a swish of glue and sprinkling glitter in the color of my choice. Then, I tip the board onto a sheet of newspaper to catch the excess glitter. You can paint the glue in whatever shape you like to make glitter shapes. Try painting a heart or even a glitter rainbow. I recommend buying eco glitter because regular glitter is made from plastic and is basically a ready-made microplastic, which is detrimental to marine life. Eco glitter is biodegradable, so it poses no threat to wildlife.
3: I use embellishments made for greeting card crafting. I like using 3D embellishments such as ribbon bows, butterflies, flowers, gems, and text. They add another dimension to my board and add texture and levels. Again, these are easy and inexpensive to find online in places such as Amazon and eBay but be warned, they are addictive (like stickers), and so you may find yourself building quite a collection!
Once you have created your perfect layout, stuck everything down, added your embellishments and glitter, you are done! You can choose to frame your vision board or stick it to a wall as it is. If you have lots of 3D embellishments or little hands in your home, I recommend framing it to keep it safe. Plus, framing it makes it look even better.
You can use other mediums to create a vision board for manifestation, such as a corkboard onto which you can pin your images and text. Or, if you have a big empty wall somewhere, you can stick your content to it to create a vision board for success that dominates your room.
Step 5: Use Your New Vision Board
Now you know how to create a vision board for success, you need to know how to use it. Vision boards are a visual representation of your highest ideals. They depict your ultimate aspirations, and as such, are sacred objects that should be respected and revered.
Honor your dreams by making time each day to really look at your vision board. Gaze upon its beauty and wonder and allow your mind to absorb the ideas it represents. Let your imagination take over, and your mind wander to daydreams of your brand-new life, or your life when you achieve your goal.
Importantly, let yourself feel the emotions that these results will provoke. It is easier to do this if you have created your board with this in mind, so remember that when you are selecting your content. You want it to evoke the feelings you expect to have when you achieve your goal.
To get the best results, you should place your vision board in a location where you will see it regularly throughout your day. That may be above your desk, in your kitchen, above your TV in the living room, or your bedroom.
My favorite place is in my bedroom, right by my bed. The reason for this is that whatever you focus on just before you go to sleep and immediately after you wake up gets planted deeper into your subconscious. You can think of it like mind-hacking. You are using the times when your psyche is most open and susceptible to new ideas, immediately before and after sleep, to help you reprogram your beliefs.

Conclusion
You can create a vision board for anything that you want to achieve or manifest into your life. Creating a vision board is a fun, creative, and therapeutic process, and there is no right or wrong way to do it. Ensure that you have your goal in mind, and the emotions you expect to feel when your dreams come to life. Then, find your inspiring content and let your imagination run wild. Place your board somewhere you will see it often and meditate on it, allowing your mind to enter into the picture of your future that you have created.
We hope you have enjoyed this article on how to create a vision board in five simple steps. For more inspirational content, please subscribe to our newsletter and join us in the Sacred Circle – our forum that connects you with fellow Goddesses and the Femigod team of experts. We hope to connect with you soon.


Responses